Home recording studio set up must have audio gear items.
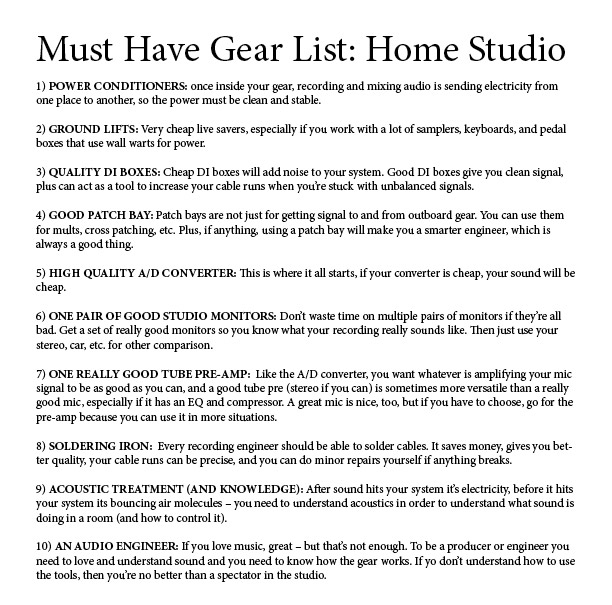
Must have studio gear isn’t always audio gear like microphones or consoles. It’s power gear and acoustics treatment which are the foundation of how sound is transmitted throughout your studio. This list of must have audio gear contains the most fundamental studio equipment list that every home studio needs when setting up. From power, to A/D conversion, monitoring, pre-amps, and studio installation, these items give your studio a good foundation to work.
It all starts with the power and good grounding. The “little things” that make the the sound quality better and gear that every good studio should have; no matter WHERE it is, basement, bedroom, garage or building. If your power is bad, your audio will be as well. Once you have clean power there we want to look at the next step up in the change: the audio gear that “convert” power to sound: pre-amps, and then the gear that converts analog to digital.
1) Power conditioner. Power strips to plug in all you audio gear are cool and cheap, but they still deliver dirty power and you want something stable in your recording studio. ![]() Why? The sound you’re transmitting through audio cables is nothing more than varying voltages traveling through a lot of different gear, which then processes and messes around with that oscillating voltage. Now imagine unstable or bad power: that power fluctuates. The power coming out of your walls is NOT always stable, it tends to dip and increase in its output. If it’s fluctuating, the same thing will happen to your audio signal. Your gear is designed to compensate for power instability, but adding good power conditioners right at the top of your system is the best thing to do. How will that impact your amplification? How will your pre-amps behave if the power they’re using to amplify a microphone signal is jumping all over the place? Power conditioners will also help you with grounding issues and hum. Just get a Furman Sound rackmount unit or two and you’re in a good place to start. You cannot have a clean audio signal without clean power.
Why? The sound you’re transmitting through audio cables is nothing more than varying voltages traveling through a lot of different gear, which then processes and messes around with that oscillating voltage. Now imagine unstable or bad power: that power fluctuates. The power coming out of your walls is NOT always stable, it tends to dip and increase in its output. If it’s fluctuating, the same thing will happen to your audio signal. Your gear is designed to compensate for power instability, but adding good power conditioners right at the top of your system is the best thing to do. How will that impact your amplification? How will your pre-amps behave if the power they’re using to amplify a microphone signal is jumping all over the place? Power conditioners will also help you with grounding issues and hum. Just get a Furman Sound rackmount unit or two and you’re in a good place to start. You cannot have a clean audio signal without clean power.
2) Ground Lifts. These are nice and cheap and always good to have around if your studio has a lot of samplers, keyboards, controllers, etc. that run off those damn wall wart power supplies that convert to DC and don’t do it well: Ground lifts. Just go to RadioShack and get a few of them. They aren’t the best solution, but they’re quick and they work when you have a ground hum problem w/ your audio gear. They remove the ground of the power and hopefully then remove some buzz and hum.
3) Good DI boxes. 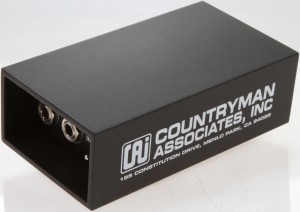 Again, w/ a ground lift they can help reduce buzz and hum in your audio signal significantly, but (or via) their primary purpose of stepping up an unbalanced signal (like a guitar or keyboard) to a balanced signal (which has a stronger signal and is shielded). You want DI boxes. Just trust on that one.
4) Good patch bay(s). Even if you don’t yet have a lot of outboard gear, it’s the correct way to access insert sends and returns on your small console, cross patch mic tie lines to your pre-amps, and get signal to and from effects processors. You might have some really nice sounding outboard gear in your studio rack, but if the connections you use to get them into your system are bad… what’s the point? It’s a car with a shiny outside, and leaking fuel lines of you have a bad patch bay and cheap wiring.
5) Quality A/D converter for digital audio. I’m assuming your tracking to a computer and not a 2-inch machine, so the importance of a high-quality analog to digital converter cannot be overstated. Spend money on a good A/D converter. The number one question for the last 15+ years coming from new audio engineers is “How do I get that phat sound?” or, “How to I make digital sound like analog?” It all starts with the converter. A good A/D/A converter helps makes digital audio sound “smooth” which is the first step in trying to get depth and warmth in digital audio. This is where all your sound, literally, gets converted to digital and back to analog for monitoring or sending to outboard gear. A bad or cheap A/D converter results in audio that sounds brittle, thin, and shallow.
6) ONE pair of good studio monitors. 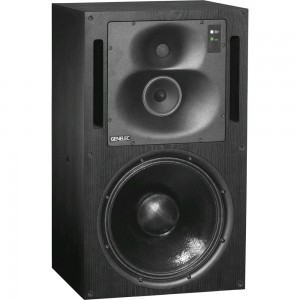 You do not necessarily need near field, middle, and mains in your home recording studio… or project studio… and most times not even a commercial studio. What you need is a set of studio monitors that are very good and that you can trust. You need to know what what you are mixing in that room is the truth, and not colored by the speakers. Yes, having multiple monitors helps you find a balance when mixing, but if all of those monitors suck… what’s the point? One good set is better than three crappy ones any day.
7) A soldering iron. Look, you want your own recording studio, and part of that means that you’ll be dealing with, literally, thousands of wires and cables. You can buy pre-made and spend $10,000 to get what you need and have lengths that are not exact, or you can buy bulk cable, a bucket full of connectors, some heat shrink tubing, and be a real audio engineer who can do a studio installation. Moreover: learning to solder and install by yourself will increase you knowledge and troubleshooting ability three-fold. Your understanding of recording studio signal flow, and how you can be creative with routing your signal will greatly improve. And when something breaks: you have a much better chance and being able to fix it.
8) A really good tube pre-amp. Like the A/D converter, you want whatever is amplifying your mic signal to be as good as you can, and a good tube pre (two channel tube pre, if you can afford it) is often times more versatile than a really good mic — especially if it has an EQ and compressor. A great mic is nice, too, but if you have to choose between the two when setting up the studio, go for the pre-amp because you can use it in more situations.
9) Acoustic Treatment. I’m writing this post in a dining room-turned-office-space. My computer is playing music (built-in converter… arg), using a pair of NS-10’s I’ve had half my life and know every characteristic, which are being pushed by a little Qinpu tube integrated amplifier. The issue, though: reflections from the wall and the shape of the room make it sound sort of boomy. Move the same set up to the living room, and I’m perfectly happy. Here, however, I have to use AU Lab to patch through Soundflower and put in an EQ to make it listenable. The point is: even if you have monitors you know well and a decent amplifier… if the room sucks, then the sound sucks. You have to adapt your system to the room.
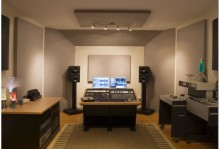 Acoustic treatment for your room is actually NOT that difficult. There are some posts here on POLITUSIC that cover some DIY acoustic treatment. In particular, getting control of your low-mids tends to be the biggest issue when you’re making a non-purpose-built room into a control room. There are tons of easy ways to build your own acoustic baffles and traps to balance out the sound of control room… and it’s NOT just throwing a bunch of foam on the wall!!! If you’re going to do it: do it right. Read about how to do it, download some designs for bass traps and acoustic panels, test the room, and then fix it.
10) An audio engineer, not just someone who “likes music”. You’re reading this post because you like music and/or make music and would like to improve how you do it. OK, then: get better by really understanding the art and science of it. Recording is not just turning knobs and setting up mics – you need to be a little bit of a geek when it comes to computers and electronics and acoustics. If you’re not, then you’ll never be really good at recording. Take it seriously. Learn.
Make yourself better by understanding sound, not just playing around with it. Don’t just mess around like an audio engineer – BE an audio engineer – that’s the most important piece of gear in any home studio. The best sound quality comes from audio geeks who are 1) skilled, 2) knowledgable, and 3) talented. You need all three — not just talent or desire.
Published: by | Updated: 12-23-2014 15:34:37


