Description and couple pictures for a Warmoth guitar build & review.
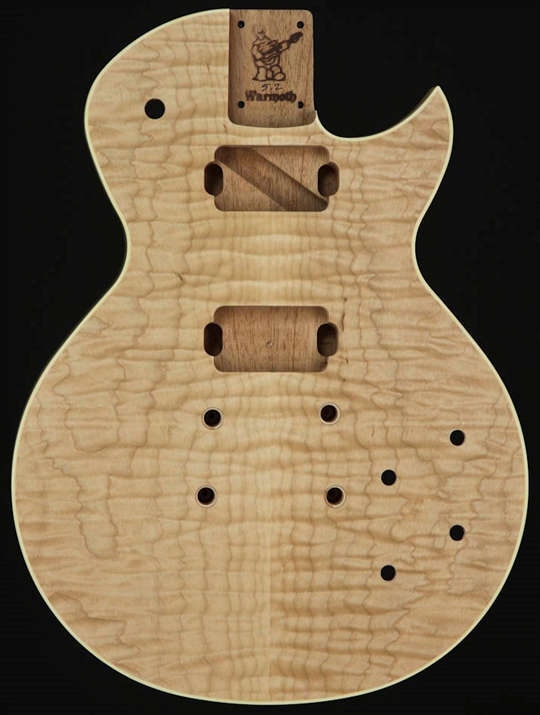
This was a first attempt finishing anything made of wood let alone a guitar. It isn’t perfect, but I learned a lot from the mistakes, which are also mentioned here. The other note is it looks like Warmoth doesn’t actually offer the Les Paul body shape anymore (too bad). They have a guitar body shape called Regal that is similar in shape and switch position, but no true LP shapes.
The Warmoth guitar body is a Les Paul LP arch top (carved top) solid guitar body. Black Korina on Black Korina wood body. All chrome hardware. I wanted a sort of dirty wood look, so when this particular Warmoth guitar body showed up on their list with that unique / odd lighter stipe in the grain down the middle, I had to give building and finishing it a try.
Of course, the additional guitar finishing supplies: I bought all of them from Stewart MacDonald, and was completely happy with both the quality and service: Grain filler, two liquid stains (Red Mahagony and Tobacco Brown), ColorTone brush-on varnish, ColorTone fretboard finishing oil, and a lot of sanding / finishing papers. (This is the first time I tried a guitar finish from scratch.). I also ended up getting son Tung Oil later on, which has become one of my standby products for anything wood, honestly.
Warmoth LP Guitar Body Build / Finish
Cellphone photos don’t pick up the depth or color of the stain very well, unfortunately. Spending more time on the staining, sanding, rubbing, etc. helped a lot.
I’ve owned a LP Standard a long time ago (that got itself a broken neck on my 20th birthday… I was in college… you can probably figure out how that came about), a USA strat and a couple other un-noteworthy electric guitars, but I went with a LP body shape out of reverence for a fallen friend. It’s important to note that the wood combination, coupled with the way I did the finish (brush on rather than rub or spray) makes it a bit of a beast in the weight area – she is a heavy guitar, but I honestly like that. Its tone is quite nice and intonation honestly better than I thought it would be from buying a random neck from Warmoth and bolting the thing onto the guitar body.
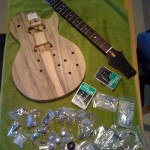
The starting point. Guitar parts: body, neck, electronics and hardware all bought from Warmoth.
The neck is pretty standard w/ the Warmoth type headstock. All the hardware chrome. The plan was to keep it a natural finish.
First off, I probably stained, sanded, and re-stained just the staining phase about 3 or 4 times until I finally got something that seemed like it would work. So the first thing I learned: don’t be afraid of starting over and sanding it down. It’s not the end of the world, and best to get it as good as you can, especially if you’re not painting over it and want the wood to be the feature. Another thing: elbow grease and rubbing that stuff in is important. Don’t be afraid to bare down on it a lot to get stain, oil, whatever as deep as you can into the wood to bring out the grain.
The staining process took about a week (just playing around after work and on a weekend) First, of course, I put in the grain filler, then sanded that, had to let it dry, followed by a combination of a red and dark walnut stain. The hope was to give the wood grain as much depth and character as possible.
I did this in my apartment, which meant no garage for doing a clear spayed finish, so this one was brushed on. It took a LONG time (I think I did 6 or 7 coats as thing as I could with light, dry sanding in between). This part added some weight to the guitar. It also required A LOT more sanding to smooth out the finish. My arms were huge from all the sanding. (As directed starting with a coarse grit, then working your way progressively to a very fine 800+ wet sanding.) What I learned here: sand, sand, sand. Then sand some more. When I thought I was done sanding, I would polish, then not be happy with it, and start sanding again. (not kidding).
To really polish it up and get it to shine. If you don’t have fancy polishing tools (like me) I found people recommending 3M rubbing compound for a car finish. Worked like a charm, honestly IF you put a lot of weight into it, and like sanding, to it about two more times after you think you’re done. You have to put on a lot of pressure and do it for a long time, but if you keep swirling and do it over and over, then a couple more times after you think you’re done, then the finish really starts to shine and the depth of the wood starts to come through really well.
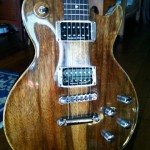
After all the staining attempts I ended up mistakenly rubbing too much off one of the edges of the front of the guitar body, but it gave it a pseudo-binding look, so ended up doing that around the entire top to frame the body from the front.
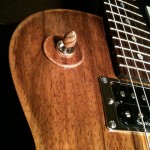
Hardware install was really easy. Biggest fear was pounding in the pegs for the bridge. I ended up buying a small sheet of koa and cut out pieces for the pickup selector switch and truss rod cover on the front (will probably redo or remove the one on the selector switch… I bought a Dremel since then so hopefully could do the edges better for a cleaner final finish. All that pretty much kept the all wood guitar vibe (hate plastic, so no pick guard either). The cap of the pick up selector switch is just some wood found in the garage and worked into sort of an egg shape (AFTER getting the Dremel, which made that part possible), then threaded onto the switch. It’s finished with Tung Oil, but that’s it.
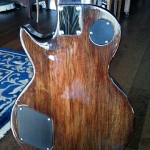
On the back, I had a small sheet of ebony that I cut for the selector switch and volume / tone nob cavity covers on the back (again… me and wood… plastic just doesn’t seem right). Also stained the back darker and with more red to get more of the standard grain on that side. I ended up buying a decent dremel to help get the shapes for the rear and front covers of koa and ebony. Those custom items took a long time, but much cooler than something stock.
All and all it’s a great guitar. Very versatile, the neck hardly needed any adjusting, and getting the intonation correct only took a few minutes. The neck is very playable, action is nice (frets pre-installed, of course) … even as a novice build I have no complaints about it (though I am curious how much weight I could take off w/ either more sanding or if I had the resources for a spray clear finish rather than brush on). When the money comes around, I already am planning on starting on a Strat body build…. thinking a big chunk of walnut. :)
