Related Recording Tips: How to Record Drums
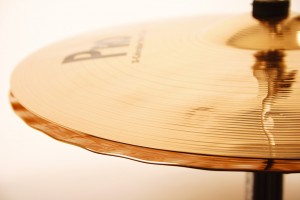 Drum hi-hats can sizzle, crash, shwoosh, and clang… they can make a song mix sound great or like an audio disaster. Sometimes it feels as though not matter how hard you work, you can’t quite get the hi-hat sound you want in a mix to match the music; especially if you’re in a home recording studio. So… we’ll give a few tips a try to get a better hi hat sound both while recording and mixing.
Your microphone placement on a hi-hat is extremely important to the final sound. A hi hat is one of those things that can change dramatically based on where you mic it. As such that’s where we’ll spend most of the time in this post: how to mic a hi-hat.
First you need to understand from where the character of the sound comes from in regards to the center to the edge of the radius. Towards the center of the hi-hat, the bell – stop and think of a ride cymbal hitting its bell and how different it is to the edge of a ride cymbal – can you “hear” how it will sound in comparison? There is much less of the sizzle. The center has a much sharper attack, more stick sound, and more of a clang that a “tttsssssttt” sound to the hi-hat. Now open and closed… again totally different (more clang when open, even more when loosely open (no pressure at on by the dummer to control it).
As you move more towards the edge of the hi-hat, you get less clang and more “sizzle” – all the interaction between the top and bottom cymbals are happening at the edges; more hits, rubs, and bounces happening with one hit of the stick.
So right off the bat for your mic placement you know: for a sharper, more clang sound, mic towards the center, for more sizzle mic towards the edge of the hi-hat.
By the way, for your hi-hat microphone: small diaphragm condenser mic. If you can run it through a tube mic pre, then that’s an added bonus.
Do you know about the microphone proximity effect that cardioid microphones have? If not read that post to save us both some time, but basically it means that as you get the microphone close to the sound source you have a bigger low-end response… not something you want when recording a hi-hat, is it? (see: knowing that somewhat geeky stuff about microphones can actually be important). So if you mic too close to the center of the hi-hat (on-axis) you’ll get a TON of low rumble from a darn hat… not cool. Personally, I tend to mentally force myself to mic a hi-hat a little further away than my first instinct is because I know that will decrease / eliminate any possible negative sound impacts from the proximity effect.
Angle: off-axis (not pointed straight down at it) will also decrease (somewhat) the direct sound pressure, and therefore decrease the boomy vibe that hi-hats can present when in a recording studio.
No keep sound rejection in mind as well when recording drums. Say we want to record a hi-hat with a lot of sizzle (sorta for Funk – or if you’re really in a rough spot and need to take any session to pay the bills, disco ;) ) Then the mic at an angle, towards the edge, and not too close is a good place to start with your mic placement. Note: you want to make sure it’s angling AWAY from the rest of the drum kit; you’ll still get a ton of bleed due to how loud it all is, but might as well try to reject as much as you can. Keep the same angle and height, but move towards the center and you’ll get more clang, move closer and you’ll start to get more body, angle it straight down and you’ll get a wee bit more low end.
When testing your mic placement, make sure the drummer covers all styles: closed, open, footing, not-footing, really whacking at it, etc.
EQ for a hi-hat suggestions:
Obviously, a roll off / high-pass filter set pretty high is a given. With your EQ, get rid of the low mids. Usually you’ll be focussing on two areas: the sizzle and airiness, and the stick / crispness of the hi-hat. Crisp and stick will sit 1.5-3kHz, you’ll usually have some nasty harshness around 4.5Khz that you’ll want to notch down some, then your sizzle and air that will help soften up the hi-hat sound will start around 7-8kHz (air around 10kHz). Make sure to BOTH boost and cut, don’t just boost, or just cut or you might take it too far and make it sound too isolated, fake or thin.

